


There are multiple methods to cut z closure that’s used on most standing seam applications. There is a standard square cut, and then there is a more advanced way which we will guide you through in this article.
This written guide is designed to be used in conjunction with our step by step installation video below:
Measuring Z Trim
Cut your zee closure ¼” less to allow space for your butyl mastic tape to be installed.
Marking and Cutting Z Trim
- Mark the width of the z trim needed and add 2” in the measurement for the folds on the zee closure.
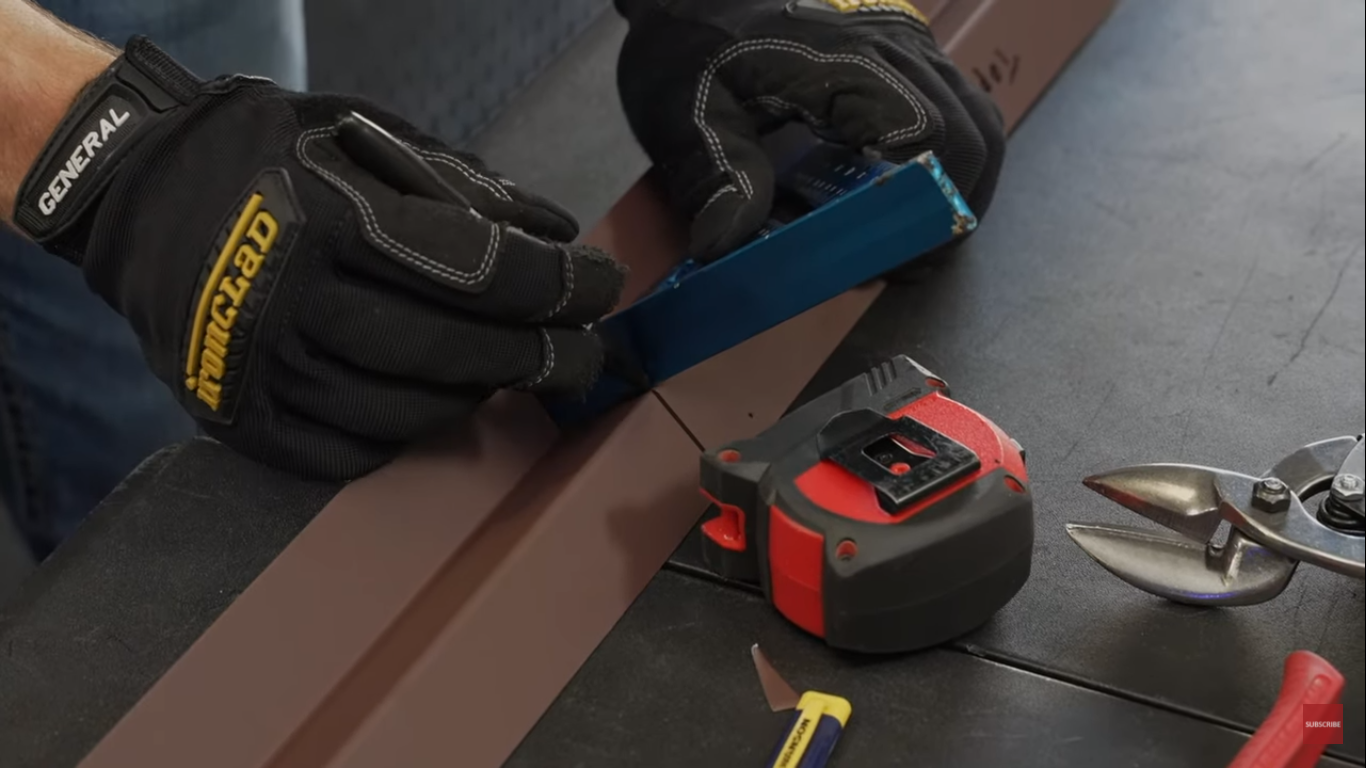
- Write “Top” on your closure so when you make your cuts, the top and bottom are clear when you go to cut.
- Square off the line and make a mark at 1”. Your two marks will be your cut line and your fold line.
- Repeat this process on the opposite side to create another cut line and fold line.
- Cut the zee metal on the cut lines you’ve created with metal cutting snips.

5. Take the bottom leg completely off on the far end.
6. Fold in on the fold line with your hand or a metal bender.
7. Repeat the cutting process on the other side.
The vertical legs you’ve created give a place to compress the mastic tape. When placed between the panel, you have a one-inch fold on both sides of the highs so that ⅞” mastic runs around the highs, and when you tuck your zee closure in, it’s an extra way to waterproof your roof.
Mastic Tape Layout for Z Flashing
You’re going to be running a continuous piece of mastic tape all the way across the panels up over the highs to create more of a waterproof seal.
- Mark for your panel on the high on the end where the transition trim will be. Make a mark 1/2” from the edge of the trim.
- Take the z bar and put mastic tape on and measure to the center of the bottom flange.
- Measure back 2 ⅜” and make a mark on the roof panel.
- Repeat this on the other side of the roof to snap chalk lines.
- Once all highs are marked out 2 ⅜” back from the zee bar, go through with a straight edge and mark out the pan of the panels to give a good idea of where the mastic will be going.
- When all marks are made, place mastic up over the top of the high and then make sure it’s seated well into each of the corners of the panel. NOTE: Don’t tighten the mastic too tightly or it will start ripping.
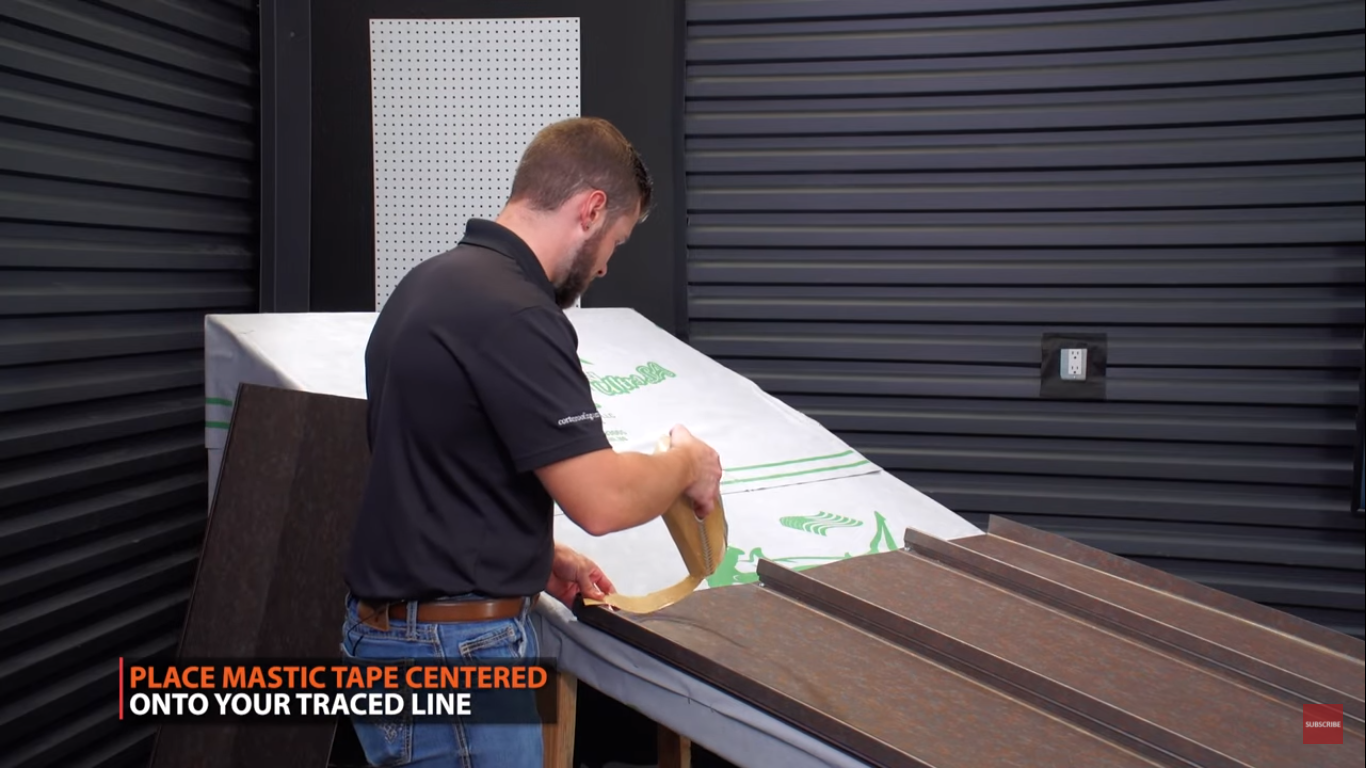
- Once the mastic tape is pressed down tightly, remove the liner.
How To Install Z Closure
- Use a drill with pancake screws to fasten.
- Always consult with an engineer to find the proper screw spacing.
- For our example, we will run about 4 screws per piece of z closure.
- Caulk the backside of the highs and fill all of the backside voids with silicone sealant.
Installing Standing Seam Metal Roofing
Installing a standing seam metal roof is a more complex process compared to other types of metal roofing. Western States Metal Roofing has helped make it easier by creating a standing seam installation video series, with step by step video guides on how to correctly install a standing seam metal roof.
Ready for a quote on standing seam panels? Request a free quote today!
