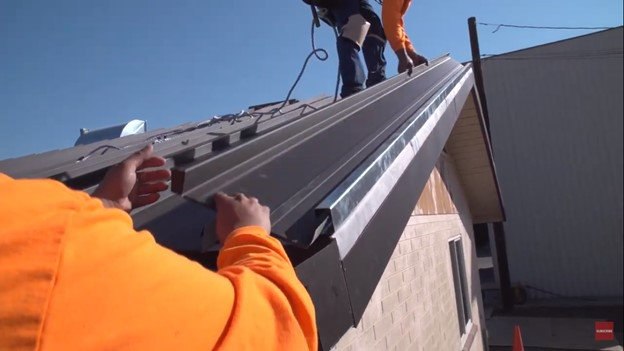


When you’re installing a standing seam roof, correctly attaching the clips is essential to having a successful roof installation. Western States Metal Roofing has the expertise to help with this. We’ve created step by step written instructions and pictures that illustrate each step on standing seam clip attachment.
This article is intended to support the video. Follow the instructions within the video and refer back to this article if you need a written copy of the instruction.
In this article, we will tell you everything you need to know to prepare your standing seam panels for installation including:
- Bending and notching standing seam at eave end
- Preparing and installing the first panel
- Clip spacing and installation
- Preparing and installing the last panel
Prior to installation, you want to make sure that your roof is clean of any dust or debris. Also, inspect the roof for any protrusions such as nails or other objects.
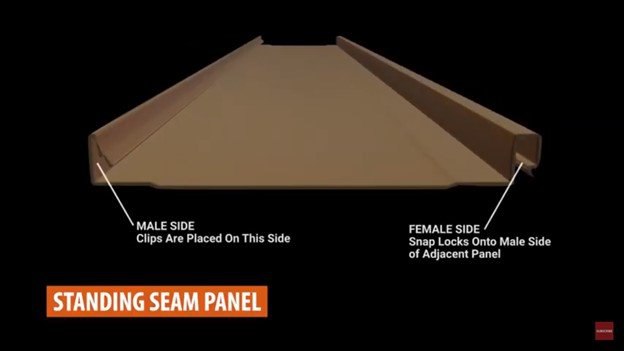
Before you begin this part, you need to know that standing seam panels have a different profile on each side - a male side and female side. The male side is the left side of the panel which allows clips to be attached and fastened. The right side is the female leg which clips onto the adjacent male panel.
How To Bend And Notch Standing Seam Metal Roofing
Prior to installing, panels should be notched and folded 1”. This allows it to hook onto the joggle cleat or bullnose eave trim. To complete this part you should:
- Flip the panel upside down for easier cutting.
- On the male side, cut a 1” notch along the seam.
- From this notch, cut a 45 degree line across the side.
PRO TIP: To cut faster, mark your metal cutting snips 1” from the tip to give you a guide without having to measure each time.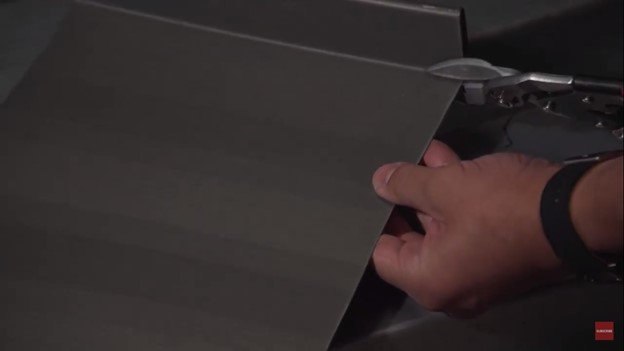
- On the female side, make a straight cut down the outer hem 1” from the panel edge.
- Pull your tab downwards.
- Cut a 1” notch along the seam.
- Fold tab inwards 90 degrees.
- Cut the excess tab so it’s flush with the high seam of the panel.
NOTE: Further trimming will take place after installation. - Using a drip edge folding tool, bend the panel at the 1” notch you've created.
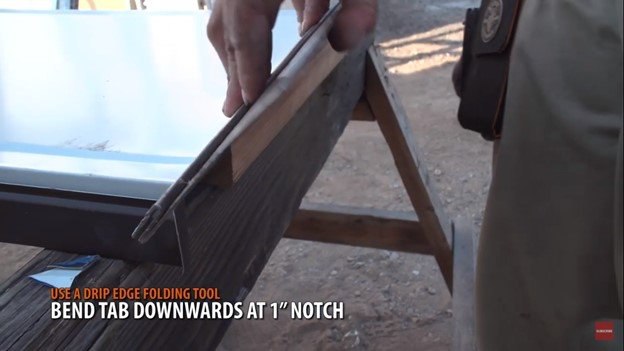
- Use a hand seamer to flatten the fold.
How To Install The First Panel On A Standing Seam Roof
If you plan the layout, you’ll have to trim the width of your first and last panel. To prepare and your first panel for installation:
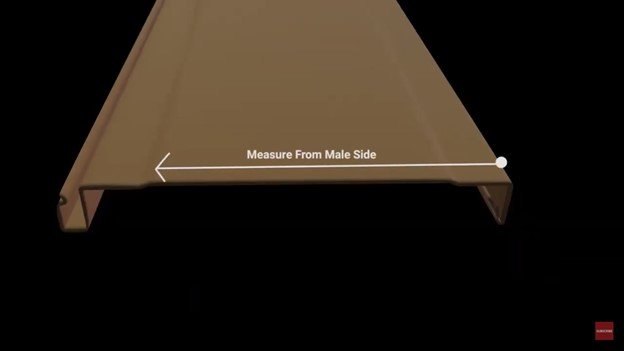
- Cut panels to custom width by measuring the distance needed starting from male side of the panel.
- The first panel will have the female side cut down and turned up at a 90 degree bend to allow it to hook to the receiver trim which will act like a floating clip and hold down the gable end side.
- Install clips to the sheet by cutting the female side and keeping the male.
- The next panel will clip over and interlock with no additional cutting until you’ve reached the last sheet. The last sheet will have an opposite cute as the first. .
- Snap a chalk line across the panel at the desired mark when cutting a panel’s width and trim using metal cutting snips.
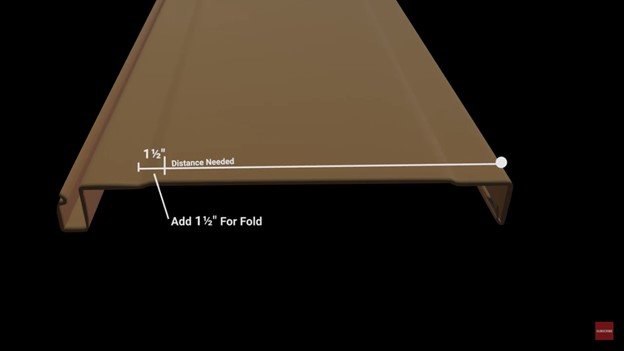
- When measuring the width, you will need an additional 1 ½ inches that will be folded into the gable side receiver trim.
- Using a tool like a WUKU Bender, the 1” seam.
- Roll the tool back and forth along the panel while gradually bending toward 90 degrees. NOTE: It’s best to roll across the entire length of the panel as you start to bend.
Once the panel is ready, simply slide it into the receiver trim at the gable end and fasten with clips.
Standing Seam Clip Spacing And Panel Installation
- Hook the panel to the joggle cleat or bullnose eave trim and set in the desired position.
- Place a single pancake screw on the ridge side of the panel to prevent the panel from slipping down.
- Begin clipping your panel into place at a maximum 8-10 inches from the edge of the standing seam sheet.
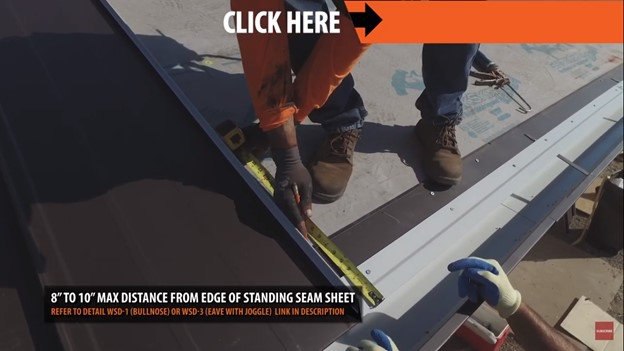
IMPORTANT NOTE: Check with an engineer for exact clip spacing. Spacing of clips will vary depending on load requirements and local building codes. - Latch the clips to the male leg of the panel and fasten with two pancake screws.
- Install Adjacent panels by clipping the female leg onto the fastened pane’s male leg.
- Place butyl sealant on the male end 1” from the eave end before snapping in the adjacent panel.
- Repeat this clip fastening process until you’ve reached the final panel.
NOTE: Remember to constantly reference your true squared lines to ensure panels are going on straight.
How To Prepare And Install The Last Standing Seam Panel
Once you’ve reached the final panel, you prepare and install the panel using these steps:
- Measure the distance needed for your final panel and add a 1 ½” for a fold.
- For this last panel, you will be measuring from the female leg to the male leg.
- Cut the male leg and prepare it to fit into the gable receiver trim.
- Slide the final panel into the receiver trim and snap it into the adjacent panel.

- Fasten with a single pancake screw on the ridge side to secure it from slipping.
- Additional screws will be installed once the ridge cap is in place.
- After all the panels are installed trim the tabs at the eave end.
Looking for more metal roofing installation videos? Go to our YouTube Channel and subscribe as we post new installation videos weekly.
Need More Help With Standing Seam Metal Roofing Installation?
For panels and accessories needed for your standing seam installation, go to the Western States Metal Roofing website to see our catalog, and request a quote or metal color sample as there are hundreds of colors to choose from.
Looking for more homeowner guides and step-by-step installation help? Be sure to subscribe to our Youtube channel as we release new installation videos weekly. You can also find everything you need at the Western States Metal Roofing Learning Center to help you have an easy and successful installation.

