Properly installing metal siding panels is a multi-step process when done right. The first step on that road always is going to be installing your base trim.
At Western States Metal Roofing, we want to make the installation of your wall panels easy and successful. This article will help guide you step by step through installing your base trim. To help you visualize this process, please check out our base trim installation detail and the base trim installation video to help you even further.
Before you begin to install your base trim for your metal siding, make sure the proper underlayment has been installed first.
Cutting And Finishing Base Trim At The Inside Corner
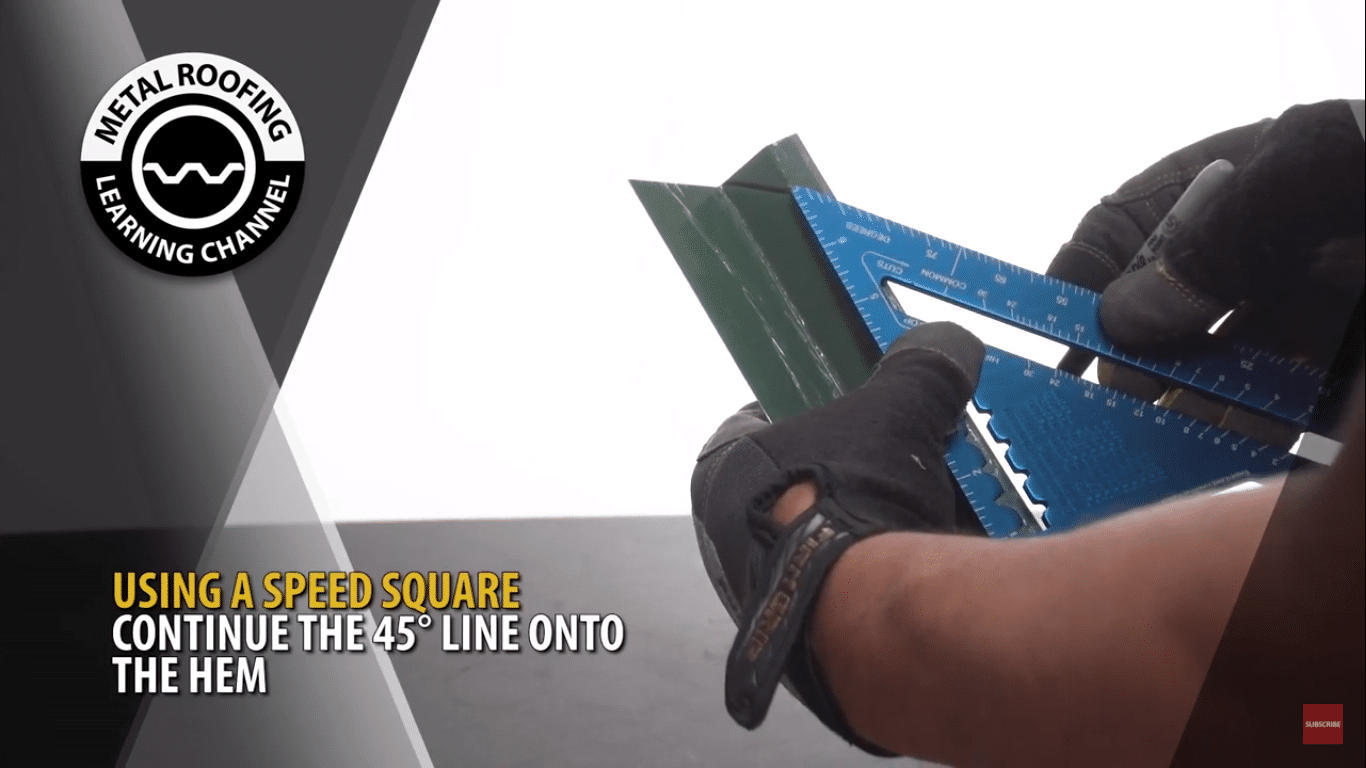
- Using a speed square, mark a straight line one inch from the edge.
- Continue the straight line onto the lower section of the trim.
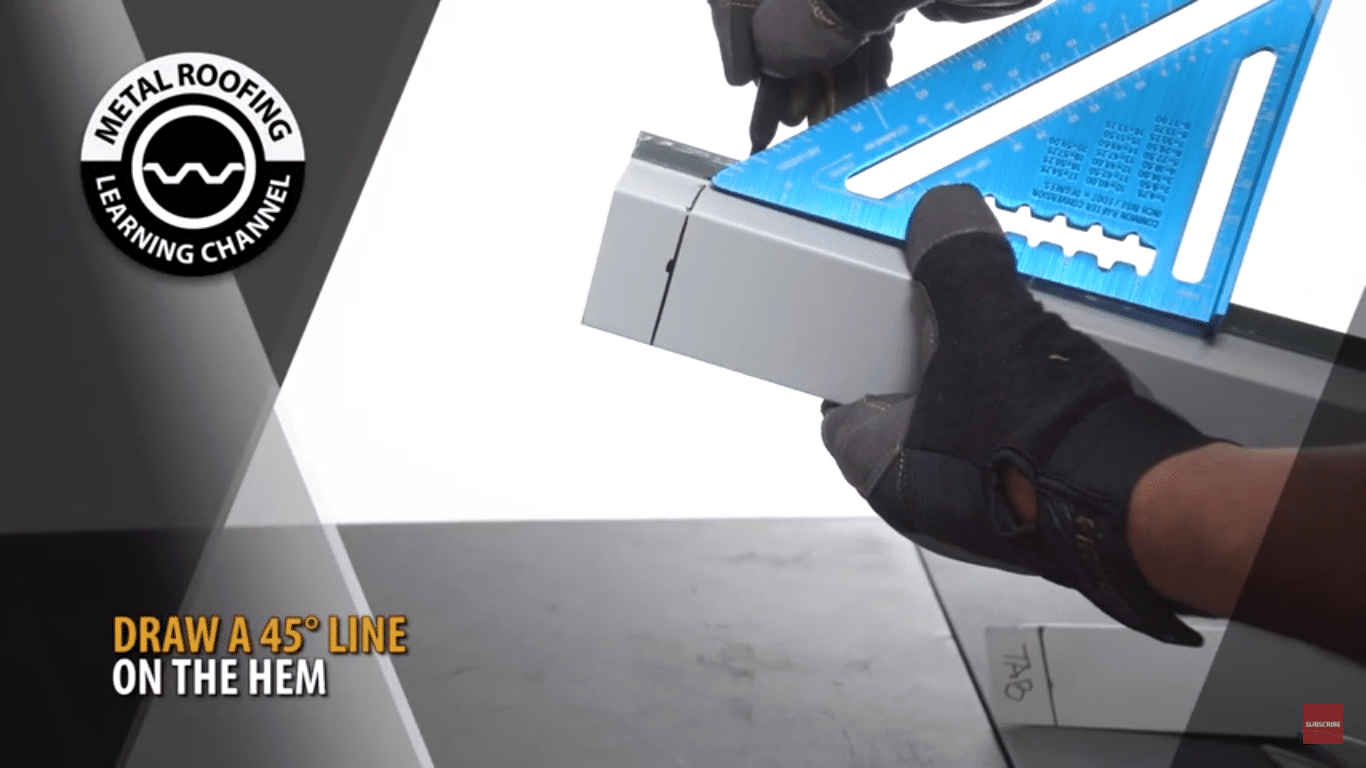
- From the one-inch line, draw a 45-degree angle inwards on the hem of the trim.
- With your cutting snips, remove the sections marked with an X. NOTE: The top flap should remain in place.
- With your hand seamer, fold the remaining flap outwards 90 degrees.
- Mark a 45-degree line on the lower section of the trim.
- Continue the line by marking a 45-degree line along the hem.
- Using cutting snips, cut along the traced line.
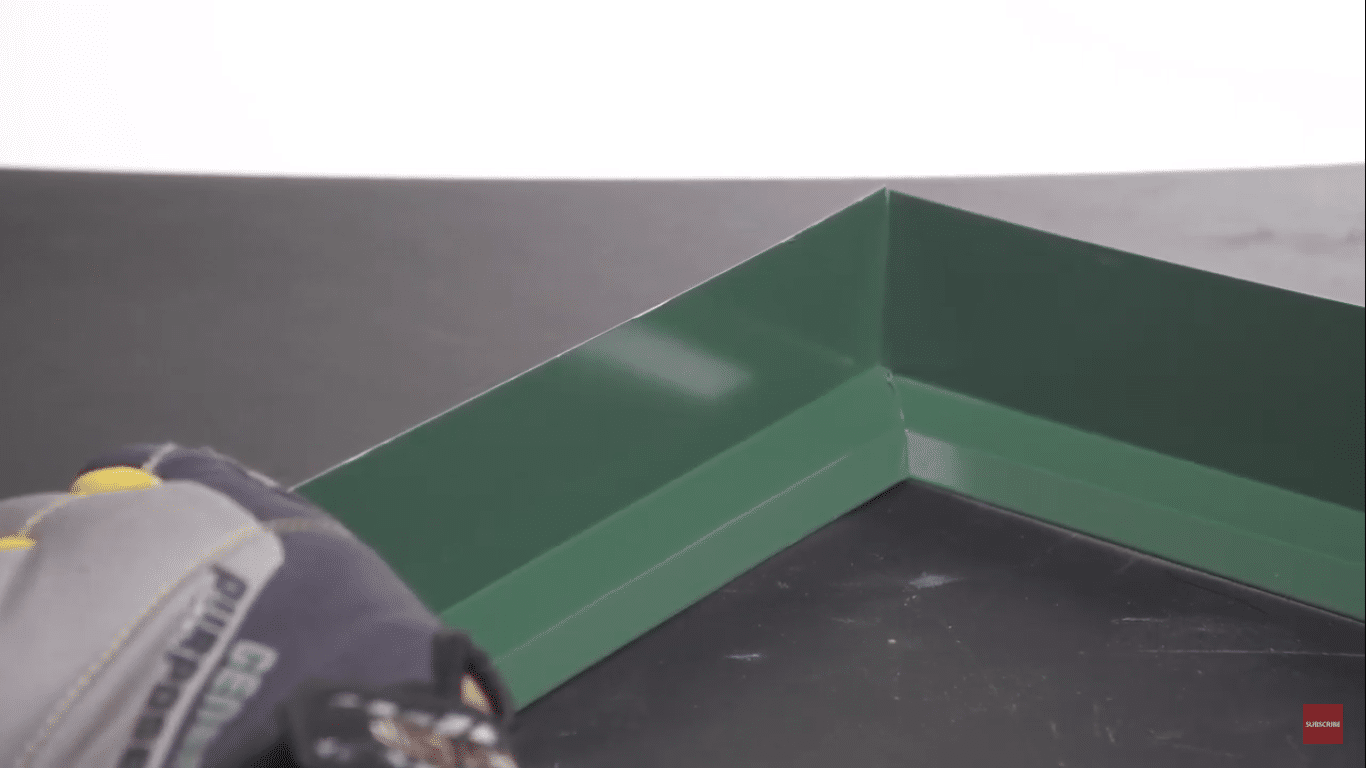
When this part is finished, the two sections should nest together.
Cutting And Finishing Base Trim At The Outside Corner
- Using a speed square, mark a 45-degree angle outward towards the lower section of the base trim
- Continue the line by drawing a 45-degree line on the lower section of trim.
- From the 45-degree line, draw a straight line on the top section.
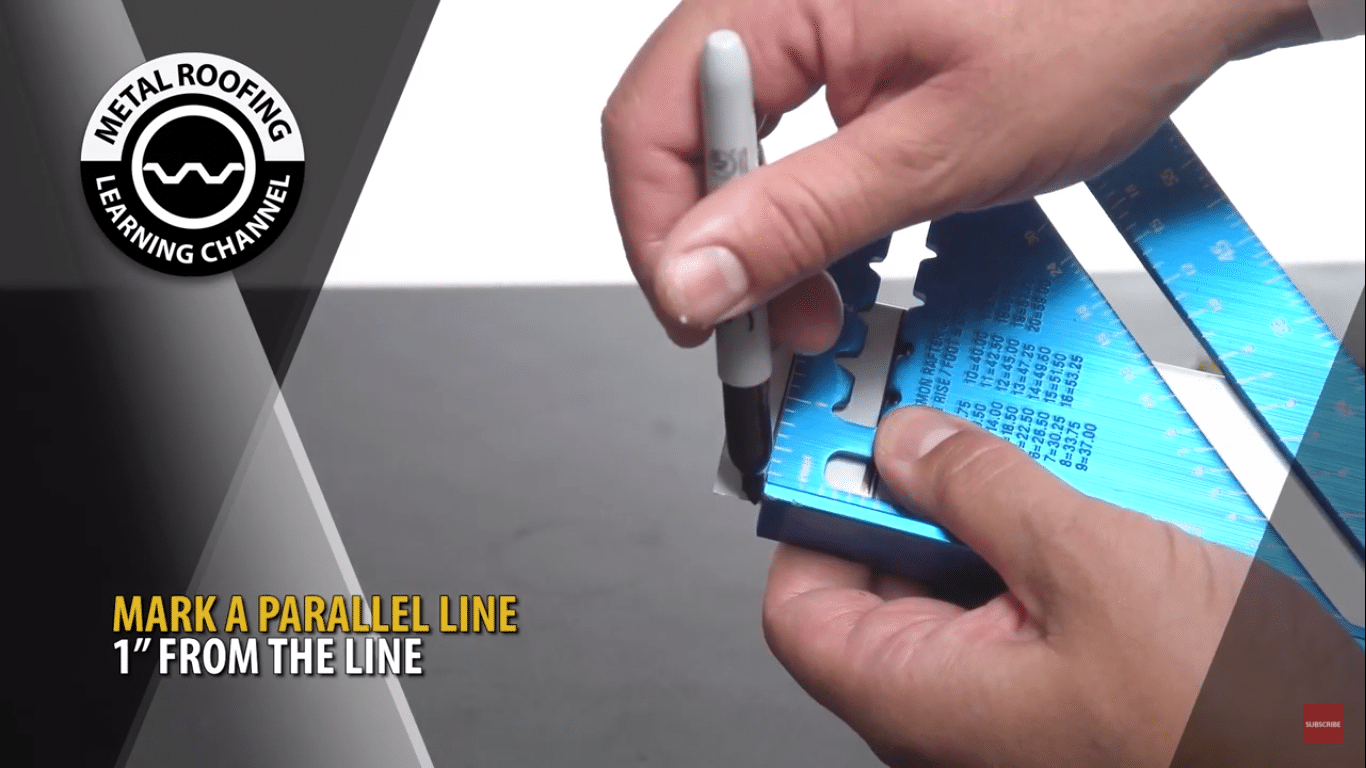
- Draw a parallel line one inch from the line.
- With metal cutting snips, remove sections along the outline you’ve created.
- Using your hand seamer, bend the tab downwards 90 degrees.
- On the adjacent piece, mark the hem 45 degrees.
- Continue the line by drawing 45 degrees on the lower section of the metal wall trim.
- From this 45 degree line, draw a straight line on the top section of the metal siding trim.
- Using cutting snips, cut along the outline.
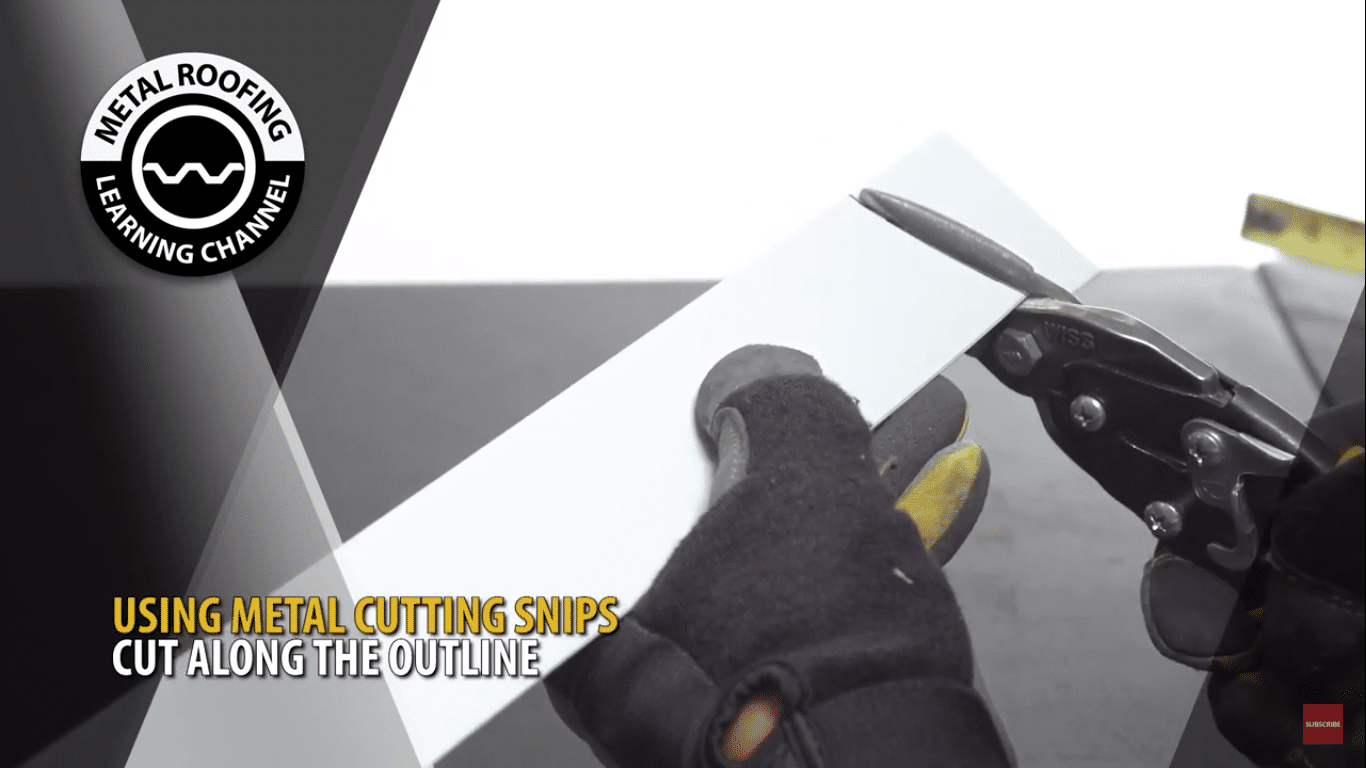
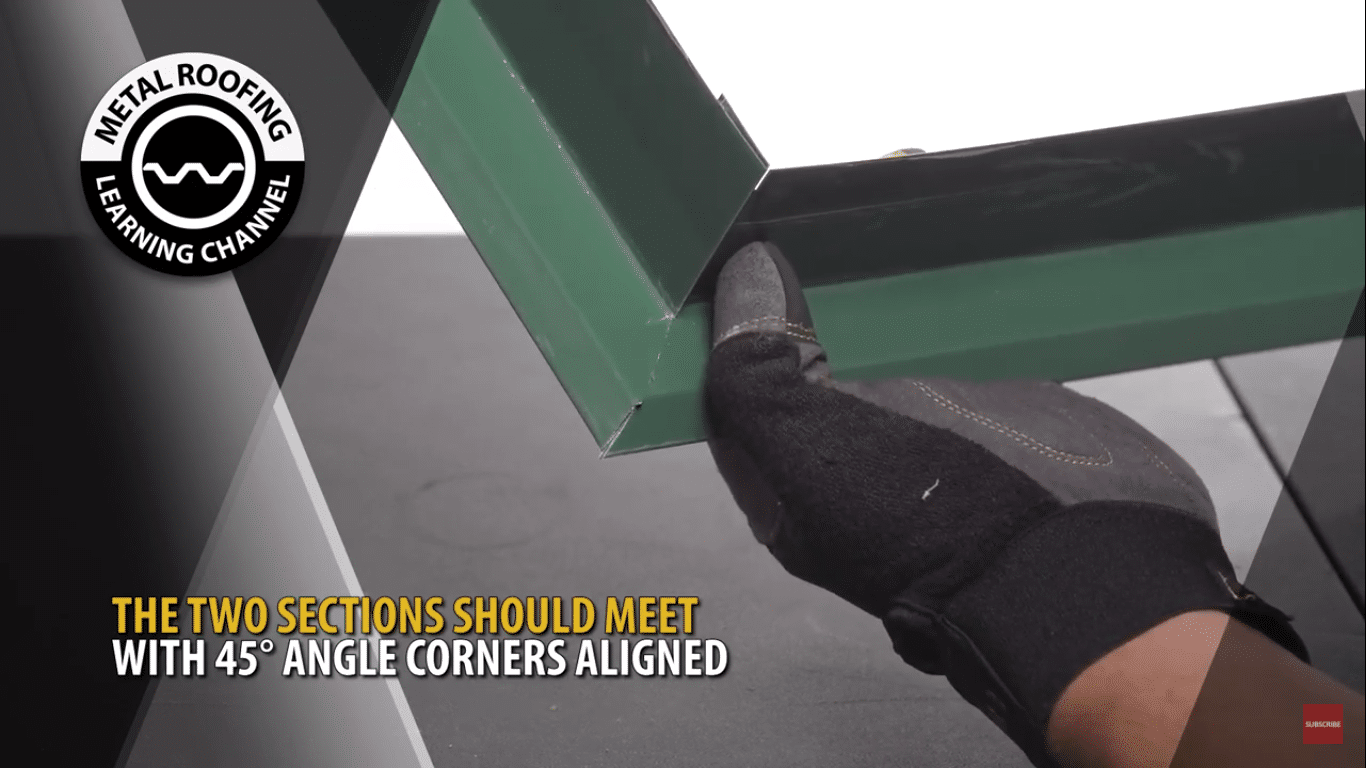
When this step is finished, the two sections should meet with the 45-degree hems aligned.
How To Overlap Base Trim For Metal Siding Panels
NOTE: Your overlap should be a minimum of three inches.
- Mark the hem by three inches.
- From this three inch mark, draw a line ⅛” from the edge.
- Using metal cutting snips, cut out the hem by ⅛” along the three inch outline.
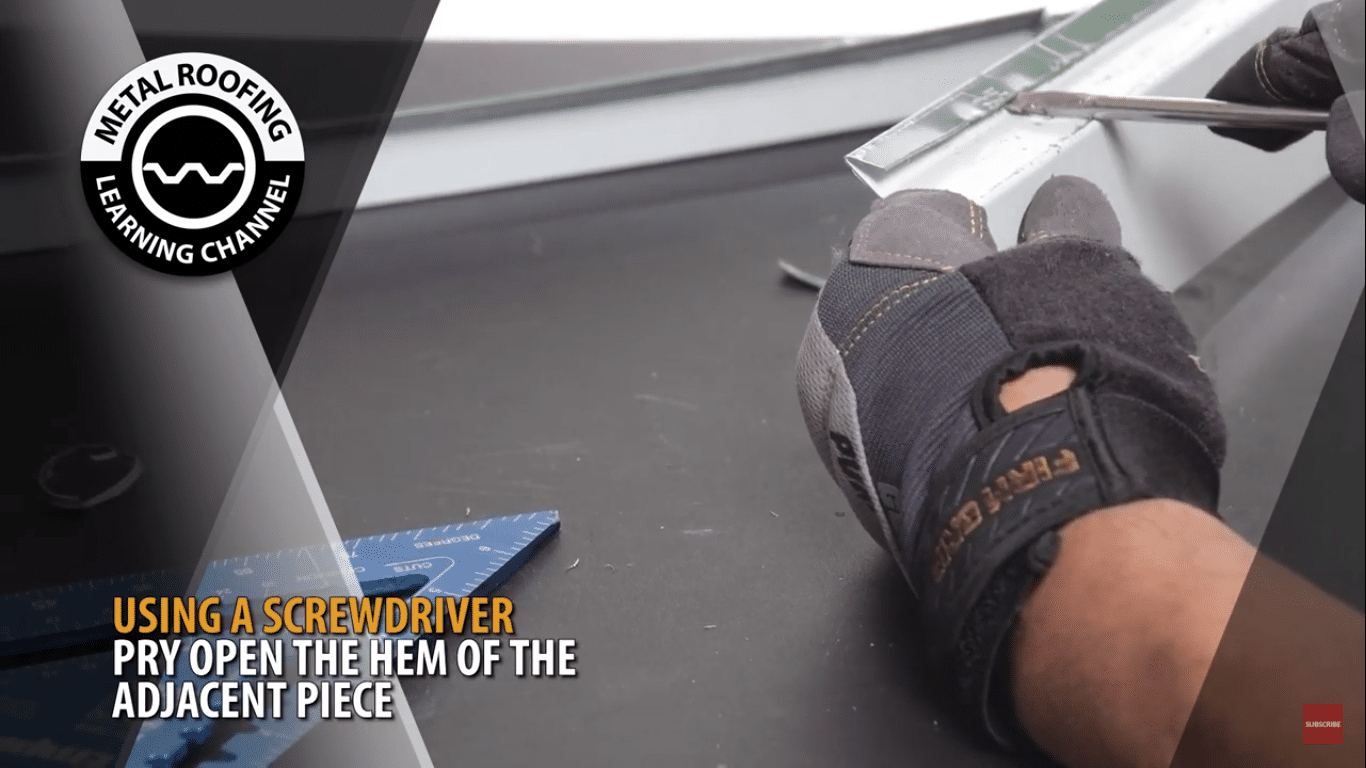
- Using a screwdriver, pry open the hem of the adjacent metal base trim three inches.
- Apply silicone sealant along the edge of the three inch area
Fastening Metal Siding Base Trim
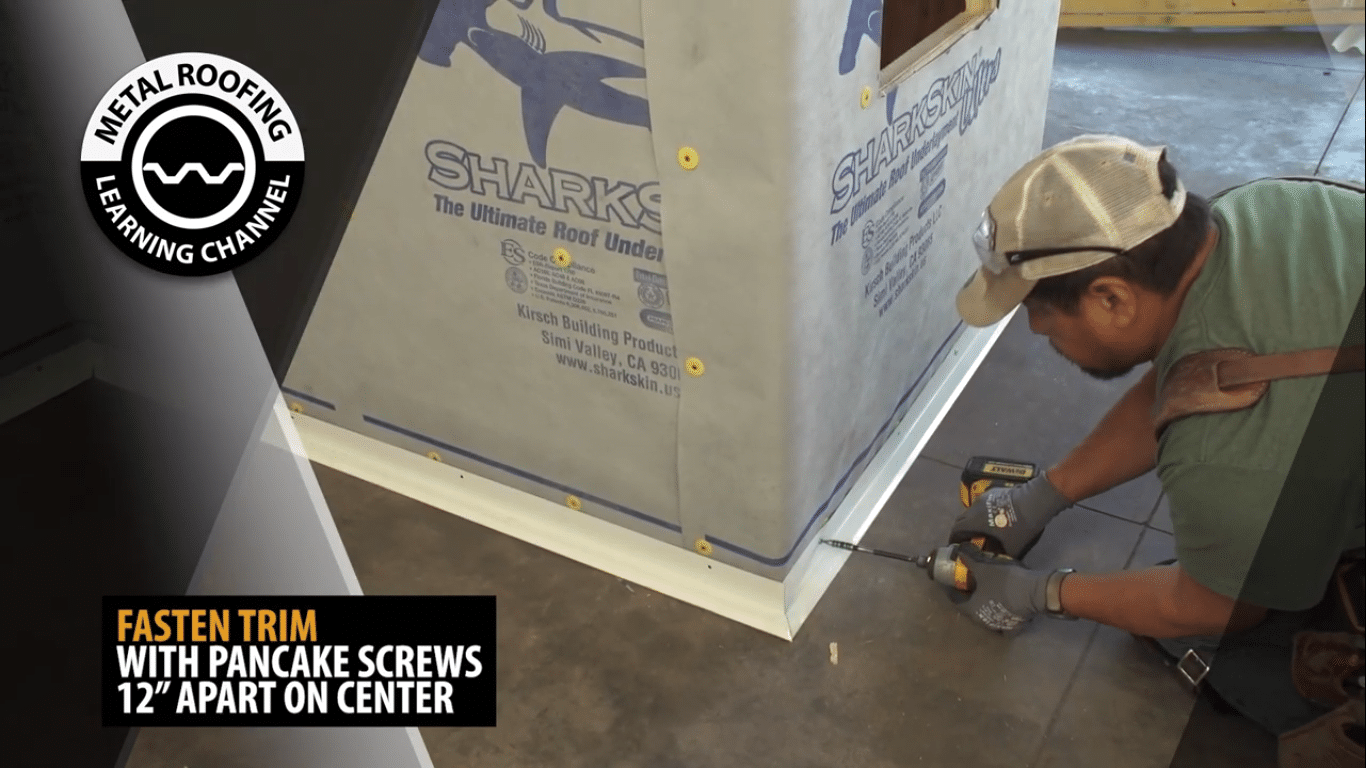
Prior to fastening your base trim, make sure to remove all protective plastic from your trim.
- Fasten the base trim with pancake screws 12 inches on center.
To help you through installing any part of your metal roof project, check out our metal roofing installation guides, view our YouTube channel and visit our Metal Roofing Learning Center.
Save Money on Your Metal Siding Panels
If you’re reading this blog, then you either have purchased metal roofing or will be buying soon. If you haven’t already bought your metal roofing panels, you can save 15 to 50 percent by purchasing directly from the manufacturer.
Western States Metal Roofing sells directly to homeowners and roofing contractors. We offer affordable delivery throughout the U.S., and we will give you great service. But don’t take our word for it—you can see our Google reviews online here.